How to Set Up a Google Analytics 4 Property

Are you interested in Google Analytics 4 (GA4) but aren’t sure where to start? In this blog, we will walk you through how to set up a GA4 property, create a web stream and set up a base GA4 tag in Google Tag Manager in only six steps. We will also show you how to upgrade your pre-existing Universal Analytics (UA) property to GA4. This blog is more of an in depth walk through than our previous post.
If you need motivation to create a GA4 property, check out our blog post 4 Reasons Why You Should Upgrade to Google Analytics 4.
It’s important to note that since October 2020, all new properties created will be GA4 by default. However you still have the ability to create a UA property using the advanced settings during the setup process, which we will show you in step two.
Creating a New GA4 Property
1. Navigate to the Admin panel and select Create Property.
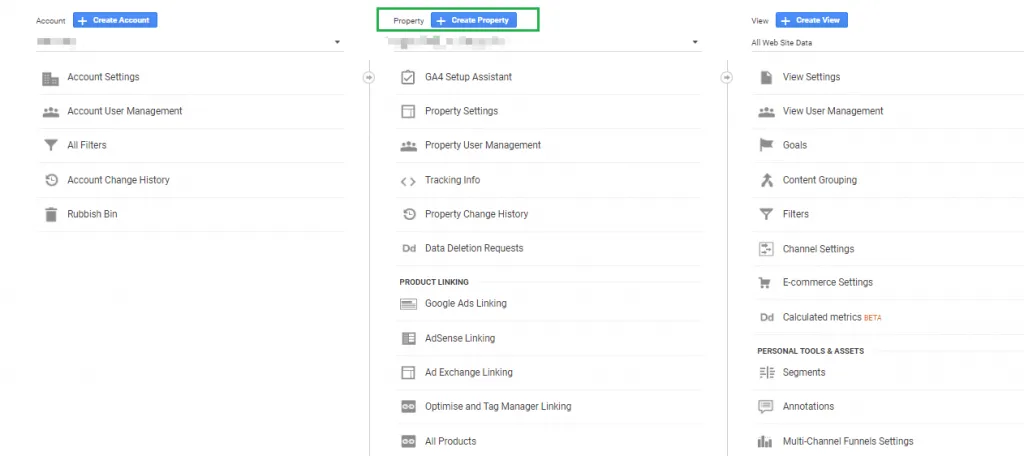
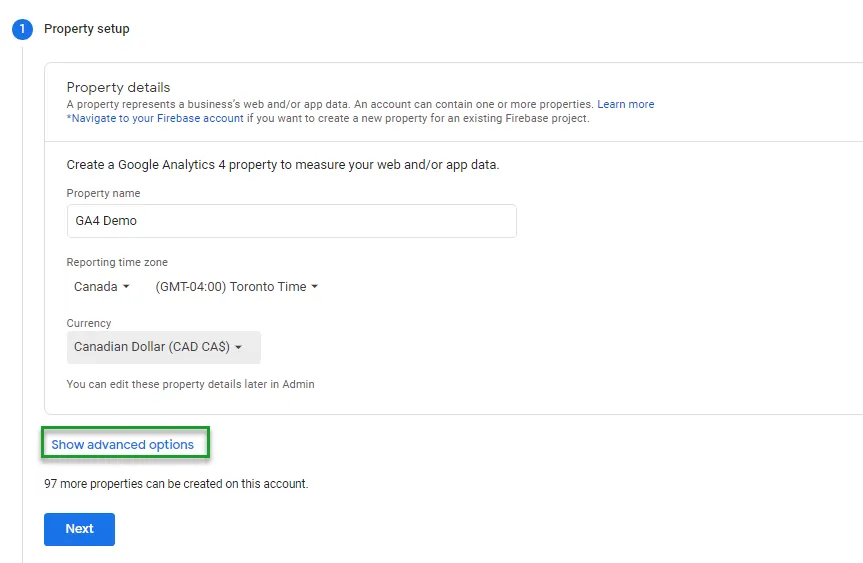
2. Input basic property and business information.
Note: As mentioned earlier, the default is to create a GA4 property. If you want to create a UA property and GA4 property at the same time, navigate to “Show advanced options”.
3. Click Web stream then input website URL and stream name.
This is where GA4 set up differs from UA properties. You can have many data streams from different sources and see all the data in one property. At this time, there is no option to rename a data stream, so name wisely! For the purposes of this demo, we will set up a Web stream.

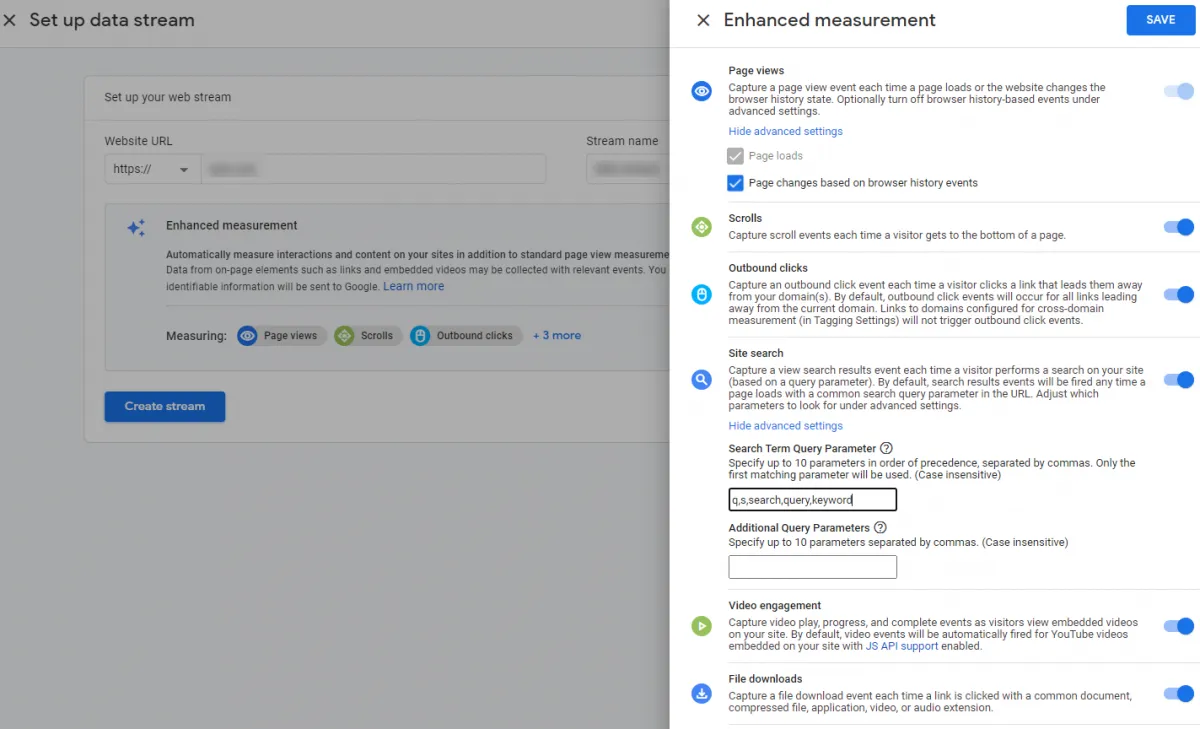
4. View Enhanced Measurement settings.
When enabled, Enhanced Measurement will track standard events such as page views, scrolls, outbound clicks, site search, video engagement and file downloads. It does, however, require either a base GA4 tag in Google Tag Manager or a Global Site Tag (gtag.js) to be present on the site before any data collection can occur. Enhanced Measurement is enabled by default, but it is possible to disable all tracking other than page views.
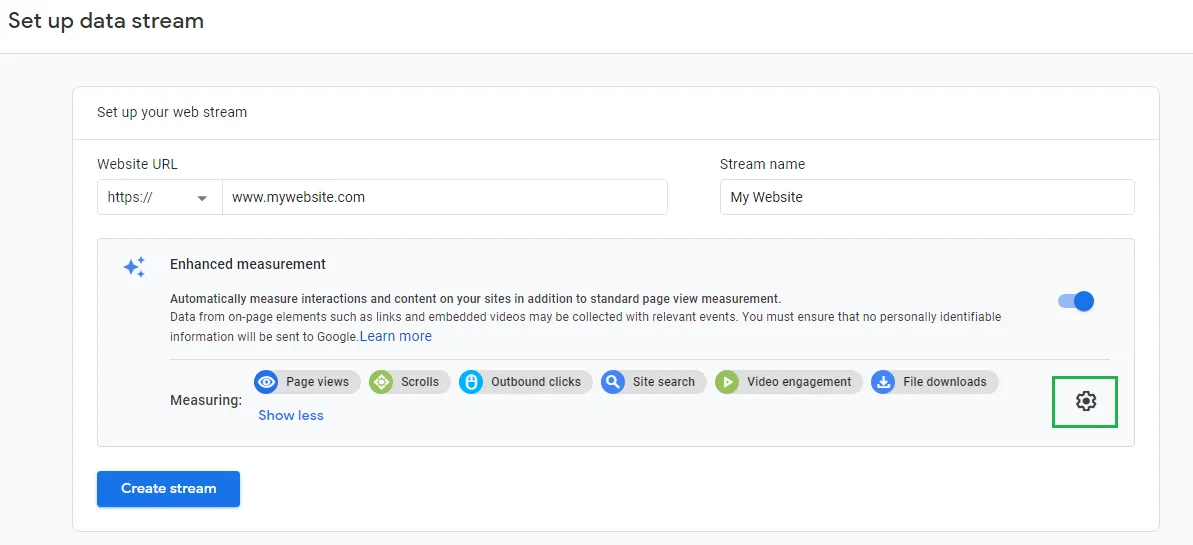
Check the advanced settings for Page views and Site search. Make sure “Page changes based on browser history events’” is enabled especially for single page applications and update Site search based on your site’s query parameters.
5. Click “Create Stream”.
6. Add tags to see data in your GA4 property.
For this step, we will walk you through how to create tags through Google Tag Manager, although you can also use a Global Site Tag (gtag.js). We are using a container that has already been implemented on our site.
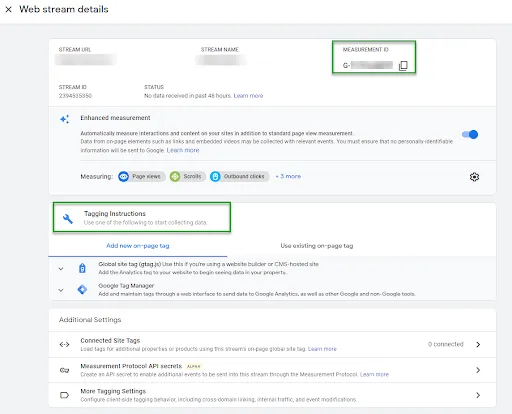
Within GTM:
a. Open the Google Tag Manager container that’s implemented on your page.
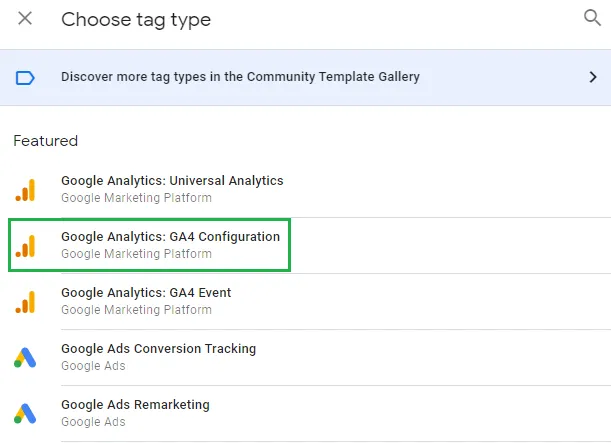
b. Click Tags > New.
c. Click Tag Configuration and select GA4 Configuration.
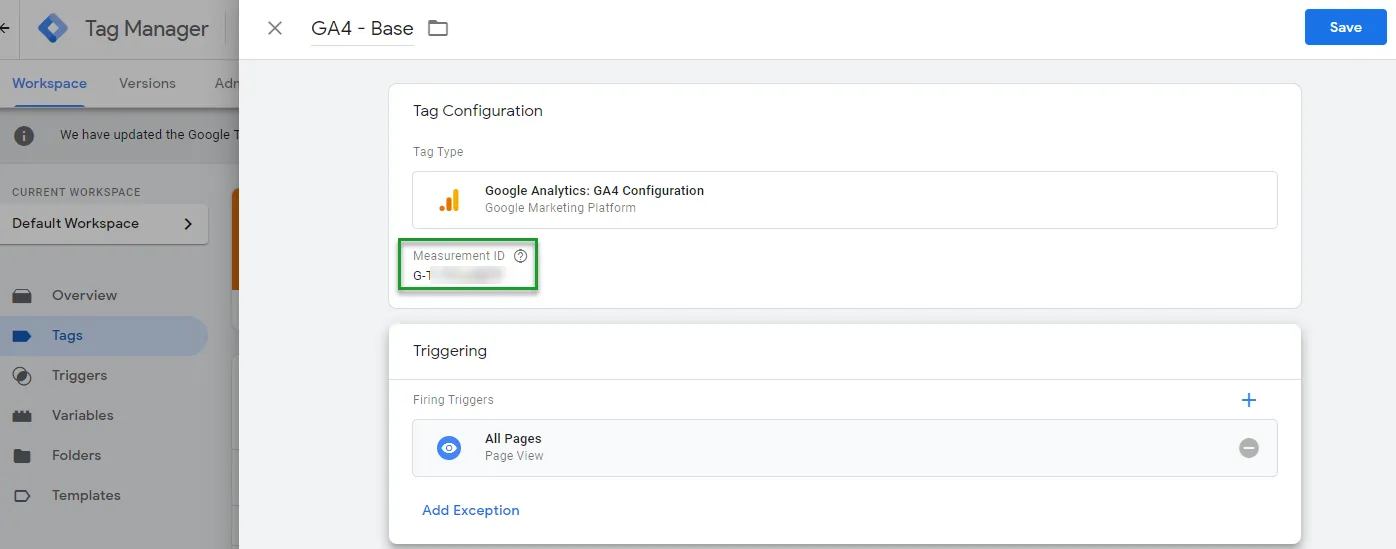
d. Enter the Measurement ID (in format G-XXXXXXXX).
e. Select to trigger the tag on All Pages (or on the subset of pages you want to measure).
f. Save and publish your tag configuration
Once your tags have been published, you should start to see data in your GA4 property within 24 hours. Congratulations, you have successfully created a GA4 property!
How to Upgrade a UA Property to GA4
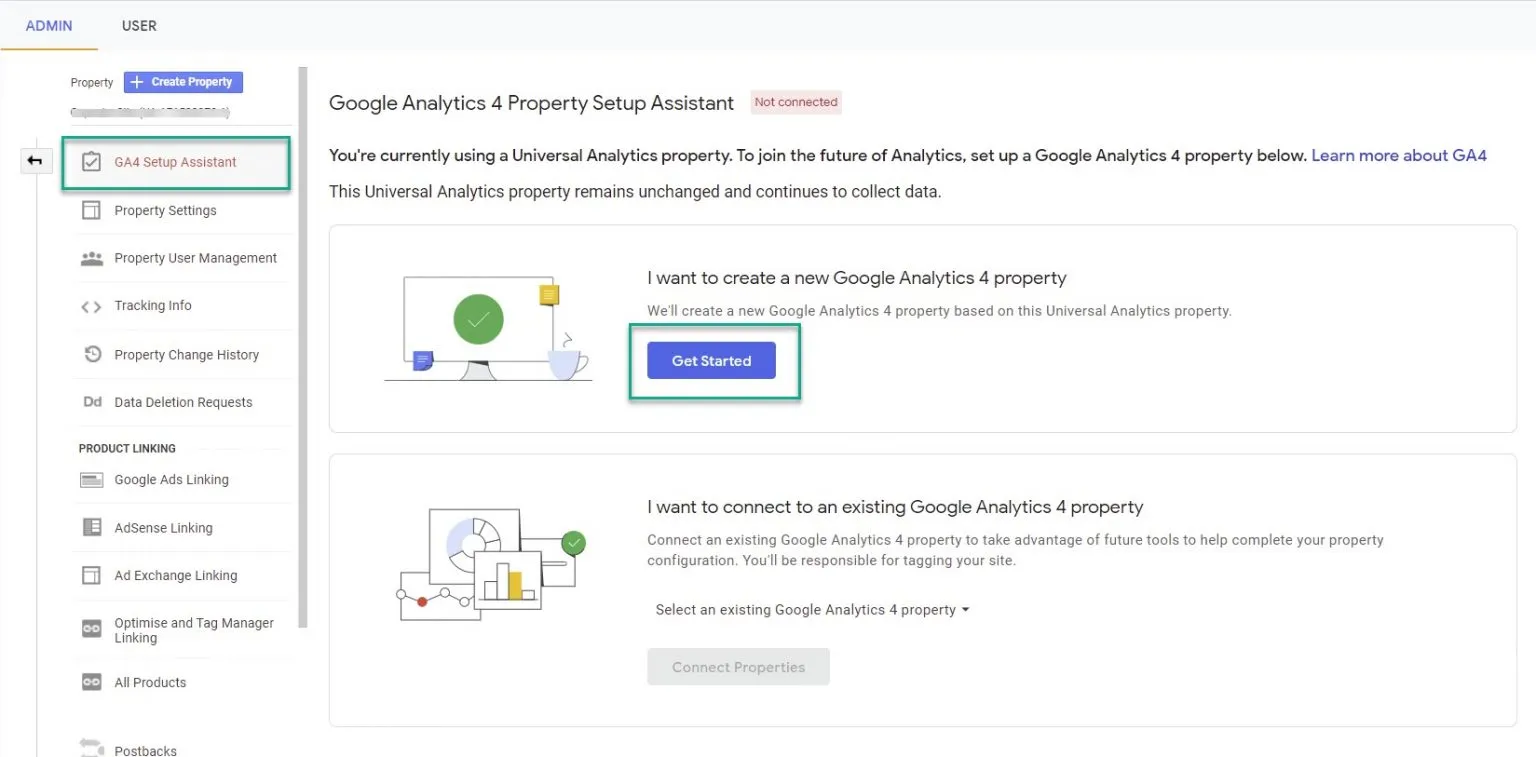
If you already have a UA account that you would like to upgrade to GA4, the setup of the GA4 property is simpler. Navigate to Admin and select GA4 Setup Assistant. The assistant will walk you through how to create your new GA4 property.
When upgrading a UA property you will still need to go through the same GTM steps outlined earlier to enable data collection.
With its new interface and data model, GA4 may seem daunting. We hope that this blog post will help you feel more comfortable getting started. Let us know in the comments if you have any questions or contact us at [email protected].

